Showing posts with label Tutorials. Show all posts

Wednesday, February 4, 2015

Cricut Expression 2 - Beyond The Basics (Part 1)

I've been looking forward to today for a while (It's Wednesday evening right now).  A couple of weeks ago I had planned a "Cricut Day" with some friends. We all planned to bring our Cricuts and I was going to share some tips and tricks with them. So yesterday I went through and refreshed my memory on all the functions of the Expression 2. My friend Sherry got an E2 for Christmas. She's such a sweet lady. I knew it was going to be a good time. 

Yesterday was funny. I'm going through all the functions and I start getting excited remembering how much it can do even without Craft Room. I was like a little kid. So today... we got together and started cutting. I introduced them to Cricut Craft Room and shared with them the Free cuts of the week. They loved it! They aren't really big on computers so it may be a while before they use CCR... but they loved everything about it. 

We had a limited amount of time and I did end up spending way too much time with customer support. One of the girls had an Expression that was frozen up so I ended up calling and they walked me through getting it going. While I hated being on the phone... I am glad that they have a great support that was able to get her machine up and running again. But because of all that... I didn't really end up having enough time to get pictures of the things we cut. I got one. LOL


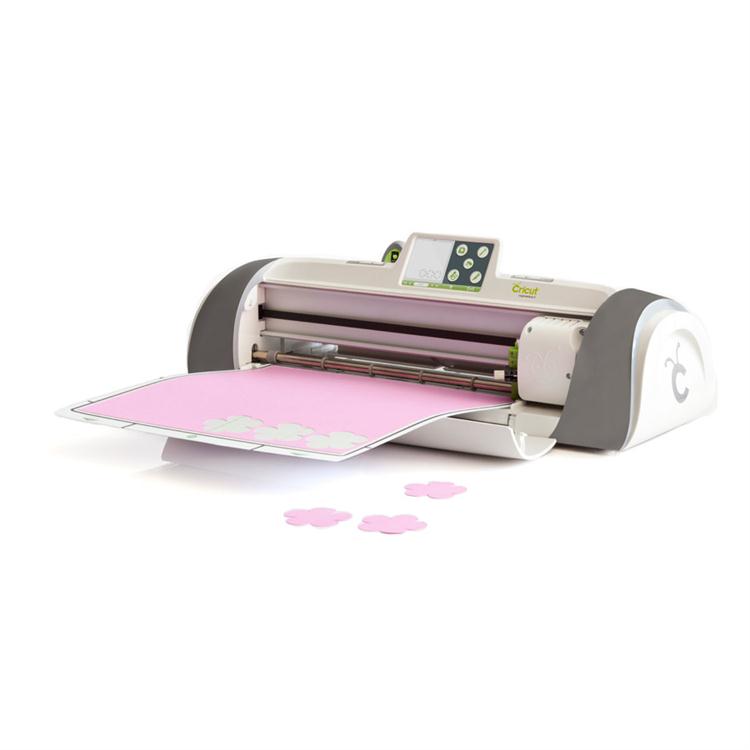
My good friend Sherry brought some vinyl and wanted to decorate her E2. We designed this in Craft Room. We used Gypsy Font for the lettering and we used Cindy Lou and for the flower. We welded these together to make it all cut out as one image. After this we cut two more flowers from Cindy Lou and put them on the grey sides. We also cut some cute images from Create A Critter and the Free Images of the week. Those hearts are super cute. 

We cut some more vinyl on the Expression using Birthday Bash and Pet Shop. I didn't get a pic of this on the vehicle but this is what we cut. 


It's pretty simple. She cut the fonts out in this really great metallic creamy color and the pugs out of black and put them on her back car window. It turned out super cute. A bit big... but still super cute. 

Here's something really cool. I have the Cricut monthly subscription. And while I already owned Create A Critter... EVERYTHING else we cut out today was either from the subscription or from the Free weekly cut. That's just amazing to me. I love it. Absolutely LOVE that!!!

Well... I started telling you most of this story not only to share the few projects we made. But also to let you know I created a quick video last night as well. We covered the Basics in my first three CE2 videos. So now it's time to go Beyond the Basics. Below you will find Part 1. We cover page 1 of the "tools" button. I'll be adding more videos covering the next pages over the next few days. So make sure you subscribe to my channel and follow along. 

Happy Crafting!


Friday, January 30, 2015

How To Calibrate Your Cricut Expression 2

YEAH! It's Friday!!!! Anybody have any awesome plans scheduled for this weekend? It's going to cold here in Southern Indiana so all my plans are going to be indoors. Well… except for Sunday. We are going to a Super Bowl party/surprise birthday party. That should be fun. 

Well.. I had a question posted on one of my YouTube videos so I thought it was easier to do a super quick video and show you how. I know I had to think about it when asked. She asked how to calibrate the Cricut Expression 2. And if she wondered… and I had to think about it… I figured there are others that would like to know as well. So…. Here we go….

Quick and Easy….

1) Turn on your machine.
2) Tap on the circle button in the top right hand corner that looks like a wrench. This is your tools settings.
3) Below the circle buttons there will be two arrow. Click on the one pointing to the right. You will tap through four times till you get to the last page. 
4) In the top right hand corner there is a rectangle with a plus sign in it and a stylus/pen. Click on this button. 
5) Follow the on screen instructions.

The End! Your machine is now calibrated. I would do this anytime you've moved the machine a lot or if it's been sitting for an extended amount of time. 

Pretty easy right? Well… If you are more of a visual learner… here's your video. It's barely over a minute long. Hope this helps. 


Wednesday, January 21, 2015

Cricut Expression 2 Video Tutorial Series

Hey Cricut Lovers!

Around two and a half years ago (May 2012) I started a video series on the Cricut Expression 2. It is an amazing machine... but I happen to think ALL of the Cricut mahines are amazing. So what sets this machine out from the rest?


Well...lets start from the beginning. I started my love of Cricut machines with the very first introduction at the Summer CHA in Chicago back in 2005. Over the years I've purchased each new machine. The only Cricuts I have not owned are the Cricut Cake and the Cricut Mini. As a proud and very excited new owner of the Cricut Explore I can say there are definitely some advantages of the Cricut Expression 2.

I was reading some comments on my YouTube videos today and one thing popped out at me. I have several friends that love the Cricut. And many that are not computer.... savy... I guess you'd say. They have no desire to learn about Cricut Craft Room or Design Space. And as some comments show... there are still many crafters that don't want to be connected to the internet or a computer. For this reason I believe that the Cricut Expression is very special.

Personally... I'm in love with my new Cricut Explore. I LOVE LOVE LOVE it!!! It's absolutely amazing. But the Expression 2 is also pretty amazing. The E2 has many capabilities all by itself. No need for a computer or internet access. Don't get me wrong... plug that puppy into a computer and use Cricut Craft Room with it and your definitely going to have a multitude of more options. But not everyone wants to be connected. And... being able to unplug from the internet and computer allows you to take your machine to crops, friends house and other events. I also have some friends that live in places that their internet is limited. So they need to have the ability to disconnect. The E2 is the perfect solution. 

So lets get back to my video I created back in May 2012. If you are a subscriber to my YouTube channel you'll find many more videos on Cricut Craft Room than the E2. But even after creating that first E2 video that long ago... it's still relevant today. ALL of my Craft Room videos are now out of date due to updates to the software. But there are no updates to the E2 that change anything. So today the 2012 video is just as relevant. 

Many people have learned about Cricut and ran out and purchased the  machine. I hear way too many times that they have never used it or used it once or twice. Most of the time.. it's just simply because they don't know how to use their machine. This is precisely why I started making videos about Cricut. I have had an early love for the Cricut Bug and I wanted to share my excitement. I wanted to create videos that would empower my fellow crafters to make the  most out of their investment and get these amazing machines into action. 

In this series I wanted to start with the basics. But I did use a cartridge that really stood out to me as one of the best cartridges I owned. That is Close To My Hearts Art Philosophy Cartridge. 


This cartridge has so many possibilities. But where I started was from the cartridges handbook. In every Cricut handbook there is a starter project. And that's what I used for my tutorial. It's actually a great project to start with. It's simple yet has elements of paper, stamping and 3D projects. The roses are so fun to make. 


So...here is the video series that I started all those years ago. Nothing has changed. This is the original video from May 2012. I hope you will learn the basics of the machine and be able to start using it. 

You can click HERE to take you directly to my YouTube channel to all three videos or click on each individual video below. 


In Part 1 I go over the basic functions of the CE2. Here you will learn what each button does. 


In Part 2 we take what you learned in Part 1 and put it into action. We actually take the lessons we learned in the first video and create a project so you can actually make something. 


In Part 3 we actually have cut all the project pieces from the 2nd video and will assemble the card. Most of this video is just basics of card making. But the making of the 3D flower is very helpful on this project.  


I hope you enjoy these videos and that you will get your machine out and create!

Happy crafting!

Tuesday, January 20, 2015

Cricut Expression 2 Video Series... Part 3

Hello my Cricut family. Just a quick post here. I'm so glad to finally get this Part 3 of the Cricut Expression 2 video series uploaded to YouTube. It's been a long time coming. Now that I got that all taken care of I can finally get on to more videos. I think there is a lot more we can still learn about the CE2. I look forward to sharing more videos with you.

I am excited to bring a new video series to you as well.... the Cricut Explore Series is coming soon!!! Do you  know what that means??? Yep... I got one for Christmas. YEAH!!! And I absolutely LOVE it. But... I love all my bugs. So I won't be abandoning any of them. This is going to be an exciting year.

Here's your video. Hope this series inspired you to get your Cricut out and make something. 

Happy Crafting!!!

Wednesday, November 26, 2014

Cricut Expression 2 Video Series PART 2… FINALLY!

Wow! You may recall that a while back I FINALLY was able to get my iMac working. I spent several days on the phone with Apple Support and was able to fix a lot of issues I had been having. There were multiple issues but basically the thing just wasn't working right. With issue after issue I just walked away from it and stopped using it. It was the computer I used for my blog and for editing videos… so after that my ability was limited. As far as videos were concerned… I was done. I had no way of uploading and editing videos. I had actually already made a video on the Cricut Expression 2. I absolutely love Cricut Craft Room, but I also realize that not everyone has access to a computer or even wants to work that way. I made a video and divided it up into three parts. I was able to successfully upload the first one. However… thats as far as I got. At least… till I got my iMac working. While sorting through the files and deleting junk… I found the other videos.

If you watch my CCR videos… You'll notice that they are somewhat outdated. I taped them when there was a previous version of the software. The E2 video doesn't rely on any software on the computer so it is still very relevant.

So here it is… FINALLY!!!!

Cricut Expression 2 Video Series - #2 The Basics (Part 2)


I hope it's helpful. I appreciate your patience. :)

Part 3 will be uploaded soon. 


Wednesday, October 29, 2014

Recap: Cricut Craft Room Video Series

So I was looking over some of my past videos to remind myself what I have done and what I could do. Man... Cricut Craft Room has changed so much. It's fun to look back to where it started and how far it's come. The videos are still useful... but it's time to do a total update. So many things have changed. It's hard to believe that I have 11 videos on CCR. Here is a link to my YouTube channel and the Playlist for this video series. 


I actually covered quite a few topics. Here are the topics


If you have any questions on any of these videos feel free to comment here or on the video. I FINALLY was able to get my iMac up and running again. So now I have the ability to start making videos again. I'm hoping that all the issues I was having with iMovie were fixed with the fixes the wonderful Apple tech Andrew helped me with. Over 6 hours of tech support with Andrew. He was amazing and his dedication to helping me get my iMac working has renewed my belief in Apple products. (LOL... sorry... random insert about Apple)

Thursday, February 13, 2014

Fun Projects with Cricut Craft Room and Vinyl

Yesterday I posted about this week's Free Cut in Cricut Craft Room. You know how much I love CCR. I wanted to share some signs I made not too long ago. I made quite a few for Christmas gifts. I love making them. I get to use my Cricut, CCR and play in my wood shop. Can't go wrong there! :)

So here are a few that I did.


Along with My Cricut Closet I also do woodworking. It's something that I've always dreamed of doing and just been able to accomplish over the last year. It's a lot of fun... and even more fun when I get to use my Cricut on my wood projects.

To start I had a 1x3 poplar board that someone gave me for FREE. (Gotta love that!). I cut several pieces down to a size that looked appealing to me. No special measurements. Plus I had a few scraps laying around that I also used. I spray painted them all black. The larger pic "something good's...." was an old cabinet door that I trimmed down.

(I shared this pic in a previous post... but I hadn't completed all the signs)

I used Cricut Craft Room to type up the words I wanted to use. I have a video on using text in CCR. While this video was made a while ago and some features have been updated in CCR... the basics are still the same. Here's a link.

So using CCR I added my text and welded the letters together for the cursive words... Faith, Hope, Love, Joy. I used Gypsy Font for those. For PRAY and FAMILY I used Close to My Heart - Art Philosophy. That is truly one of my favorite cartridges. LOVE IT! I also used Art Philosophy for the longer saying. I used CCR to place my text on the mat the way I wanted it to look on the board. 


Ok. So you may be wondering what I did here. This was a special order for a Christmas present for one of my friends. She called me up and asked me if I could make a sign saying this. It was something special to her and her mom. Her grandpa used to sing it to her mom and to her. I created a new file and started by using Cricut Craft Room Basics. She had given me an idea of how big she wanted the sign. So I added a square at the dimensions she requested and colored that Layer black. I then added  a second layer with my text and colored it white. I did this so I could see what it would look like. 
Next I played with it. Originally I just added the whole saying as one text block. Then I started over and added each word as it's own text block and moved them around resizing them till I had what I wanted. 

Next step... after getting all the text the way I wanted them... I cut them using my Cricut Expression 2 and some Vinyl. They came out just as I wanted them to. 


So all the white lettered signs were done with the Vinyl. I applied the vinyl and then used some Mod Podge to seal it so that they would not come off down the road. I used the transfer sheets to get them aligned. Also... when I couldn't find my transfer paper I had a roll of clear contact paper that worked just as well. 


The red words were done differently. I love the look of the vinyl but I also wanted to try something else as well. After removing the letters I kept the negative and I used these as stencils to paint on the other blocks. Worked great. Now you could certainly do some sanding and make them look distressed, but I chose to leave them as they were. The painting took a little longer but it was still super easy. 

The "Family" sign I added an extra step. After painting it black I used some red spray paint and painted it a deep red over the black and then lightly sanded it randomly and added black vinyl letters. I like the way it turned out. Here is a closer shot of it, as well as some more pics. 


Just one last note. I mentioned which fonts I used for each of these. If you look at them and think that they don't really look like those fonts... I squished and stretched and manipulated the text in CCR. So they may look a bit different. Just another feature about CCR that I love. You can manipulate images and text until you get the look that you want. :)

Hope you enjoyed these and that it inspired you to make some vinyl signs of your own. As always.. I'd love for you to share your creations with me. 


Thursday, May 17, 2012

Cricut Craftroom Video Series


Hello my fellow Cricut lovers. As you may know I am currently working on a video series for the Cricut Expression 2. I'm pretty excited about it. Every since I got my E2 back from Provo Craft I have just been cutting away with it. Loving it!!!
Anyhow... my previous video series was on Cricut Craftroom. After playing around in CCR a couple of weeks ago the program kept crashing and then eventually crashed my computer. NOW... to be fair... it may not have had anything to do with CCR. But because I was so frustrated with CCR crashing I just haven't been on there and plus I've just been too busy with my E2. However... I have a couple of projects that I'll be creating and I wanted to use CCR for them. So I'll be playing around with it again. While I'm not planning on abandoning my E2 series... I'll be adding some things in there like a couple of CCR videos. SO... what would you like to see? Any techniques that you are interested in? I had a request for Mothers Day card the other day but time got away from me.

In the meantime... I have created a playlist of my past CCR videos on YouTube. Here is the link. If you are new and would like to watch the series from the beginning I hope this link is helpful. And if you have seen them and just need a refresher... here  they are. Enjoy! And I hope to hear from you. I'd love to be overwhelmed with all sorts of comments and requests. :)

Don't forget... the Craftroom is compatible with all the Cricut machines. :)


Click for my Cricut CraftRoom Video Series

Tuesday, May 15, 2012

Cricut Expression 2 Video Series

YEAH!!! Finally! I'm so excited! I was able to get my latest video uploaded to YouTube and it's ready to go. I  had to ship my Cricut Expression 2 Anniversary Edition off to Provo Craft to fix. They couldn't fix it so they sent me a new one. Of course there are no more Anniversary Editions but they sent me a brand new E2. I got it back a couple of weeks ago and last week I made a couple of videos... only problem... I couldn't get them uploaded to YouTube. First my iMac died. That's where I edit all my videos and upload them. Then the software that I USED to love on my laptop wouldn't work. Finally I was able to edit the video and upload it... but for some reason it wouldn't work. My DH finally fixed my iMac and today I was able to upload to YouTube. YEAH!!! I actually already had Part 2 of this video filmed and edited. But that file is corrupted and unable to be saved. SOOOO.... I'm working on a re-make of Part 2 today. I've got it filmed and now I just need to edit and upload. Wish me luck! And enjoy the video.

Now is a good time to make any special requests or suggestions. This video series is going to include all the features of the E2 and will be complete with a project. If there is anything that you would like for me to work on or anything you want me to make sure I include... now is the time to let me know. I look forward to your comments and feedback!

Cricut Expression 2 Video Series - #1 The Basics (Part 1)

Dont forget to leave a comment here on my blog or on YouTube!

Saturday, January 21, 2012

Importing .gypsy and .cut Files into Cricut Craft Room

Hello fellow Cricut Lovers!!! It has been a while since my last post or video. Things have been super busy and have finally died down. But I'm BACK now and I am so excited about the plans I have for 2012. One thing you will see for the new year is more videos. Of course I LOVE my Cricut machines and CCR but I will also be throwing in quite a bit more Stampin Up! projects. I am also super excited that my husband is working on a new web site for me. YEAH!!! I can't wait to share it with you when it is up and running. I'm sure that when it's ready I'll be ready to start giving away some blog candy. That's going to be pretty exciting. I've never done any giveaways on my blog yet. So that is sure to come. Keep watching:)

Ok... so... I was able to spend a little time in my Cricut Closet today (if you read my very first blog post you'll see why I call it that:) and got to playing around with Cricut Craft Room and Cricut Design Studio. So I have a video for you today on how to import files into CCR. As you watch the video you will find that I ran into a little issue when I first starting importing my files. But thanks to the awesome people over at Cricut Craft Room Blog I was able to figure it pretty quickly. As I show you in the video... there are a few steps that you MUST take or your files will load into CCR blank.

Here's the short version....

1) In CDS open your .cut file. Change the name and save as a .gypsy file.
2) Import your new gypsy file onto your gypsy. Open the file on your gypsy and RESAVE and change the name.
3) Export the new renamed gypsy file back onto your computer
4) Import into CCR

Simple enough? Ok... here is the video in case you need a little more detail. It's great to be back!!!

Monday, November 28, 2011

Cricut Craft Room Series - Digital Cartridges & New Features

Hello! Last week I updated my Craftroom on my desktop. I was happy to see that we are out of Beta testing and that CCR is now available to everyone. Also last week, I showed a video on how to link your cartridges to your CCR. I jumped right in and that was my only concern. It turns out it was pretty simple.
After I got in there and started playin around I noticed that not much has changed in CCR. there are a few new things and I decided to do a video to show them to you. To me... the biggest change is the digital cartridges. So here is a video on the new digital cartridges and how you can get them. I hope you enjoy it and learn something new today.

Wednesday, November 23, 2011

Cricut Craft Room Series #7 - Linking Your Cartridges

Hello Everyone!

Sorry I haven't done a video in a while. Everything has been crazy around here. But things are slowing down and I was able to play with Cricut Craftroom today. I decided to make a video showing how easy it is to link your Cricut Cartridges to your CCR account. I show you in this video just how easy it is.

Currently you are NOT able to link your cartridges to CCR if you already have them linked to your Gypsy. And... as well... you are NOT able to link them to  your Gypsy once they are linked with CCR. So before you link to either, make sure you are aware of this and know which you would prefer. Currently they are working on a method that is going to allow us to connect our Gypsy and in one step... link all our cartridges on our Gypsy to our CCR account. I'm assuming that this process will also link all CCR cartridges to the Gypsy as well. As soon as I hear any more on this I will update you to let you know. For now... here is how you link to your CCR account for those of you who are wanting to do this.

Thursday, November 3, 2011

My First Cinch Project

Hello! Happy November!
I can hardly believe that it is already November. October just flew by. I've been super busy but also I have had some issues with my video editing software so I've not been able to work on any videos. I finally decided to switch to a new software. So now I am using iMovie on my iMac. I'm still learning it and trying to figure out a few things so bare with me. 
I've also been a little sick. So this video I've got prepared for you is not one of my best. I didn't realize until after watching it and editing it that I was kind of dragging. But I hope that you will learn from some of my mistakes and get a better understanding of what the Cinch can do. I hope to do an actual tutorial on the Cinch another time. 
But for now... here is my first project using We R Memory Keepers, The Cinch. 

There are two parts to this video. Here is Part 1


And here is Part 2


Thursday, October 13, 2011

Cricut Craft Room Series #6 - Edit Groups and Hide Contour

Hello! Can you believe that I got two videos to upload today? I thought I wasn't going to have time to even do one. So... this video is another CCR series episode. I hope you enjoy it. There are already so many great images on the Imagine cartridges. With separating the images you can create some completely different images. This has caused me to look at cartridges and what they have to offer in a whole new way. I find myself buying cartridges that I originally had no interest in. And of course... CCR opens up the possibilities even more.
If you have a Gypsy you are already familiar with the Hide Contour button. And again... CCR takes the best features of your Imagine machine and your Gypsy and even Cricut Design Studio and brings it all into one place. They really outdid themselves on this one. I can't imagine how they will top this.
Hope you enjoy the video. Have a great weekend :)

Saturday, October 8, 2011

Cricut Craft Room Series #5 - Fonts

Yes... another Cricut Craft Room video. What can I say? I love CCR. It's an awesome program that can do so much. But... I have done a lot with it lately and I'm looking forward to playing with my Imagine and my E2. And... just getting back to some basics and use just stamps and punches.

But for now. I have this video put together for you. In this episode I show you how super easy it is to add text to your mat in CCR. I also show you how simple it is to weld text. Hope you learn something. Don't forget to leave some feedback.
:) Angie

Thursday, October 6, 2011

Cricut Craft Room Series #4 - Altering Images

Well... I have another Cricut Craft Room video for you. I'm ready to move onto the Imagine but I have a couple more for CCR before I do. I already have the next video ready. It is on using fonts in CCR. It should be on YouTube tomorrow. For now... I have a video for you. In this video I cover three things in CCR 1) using the X/Y Axis 2) Altering images using width and height and 3) the shape properties tab. Hope you enjoy.

So I am going to work on the Imagine soon. Any requests?

Friday, September 23, 2011

Cricut Craft Room Series #3 - Tools on the Toolbar

Hello! I worked hard today to try and get another video up in my Cricut Craft Room Series. I actually made two and somehow I've lost the file. It was a short video so I don't mind recording it again... but my time is limited this weekend. We have big plans so I won't be able to get to it till Sunday night <<sigh>>... but... for now... here is my 3rd video in the CCR series.
In this video I go over the toolbar that goes across the top in CCR. I hope you enjoy it. If you have any questions please leave a comment. Don't forget to subscribe so that you don't miss my next video! :)
 Have a great weekend!!!

Friday, September 16, 2011

Add Cricut Digital Handbooks to your iPhone and iPad


One of the things that I love about my Gypsy is how portable it is. I can take it to the doctor’s office, my children’s sporting events, road trips… anywhere. While I love my Gypsy and all its features, one thing I really missed was having my handbooks. When I first got my Gypsy I had a bag that I carried my handbooks in with me. Soon, as I acquired more cartridges (lol… not that I buy them all the time… right hubby)… the idea of taking the handbooks with me any longer became too much of a hassle.
Then… I learned that Cricut .com had ALL the handbooks in digital format on their website. I have an iPhone so I could look them up. But connections aren’t always that great in doctors’ offices or at Cross Country meets. Then I realized that you could download the handbooks in PDF format and sync them to your iPhone. So that’s exactly what I did. I’ve created a tutorial to show you the process if you are not familiar with it. Feel free to skip to the steps that you need to if you already know how to do this. But this is how I did it from beginning to end. I’m still pretty new at this whole blog thing so I did the best I could to show you images of what I did. Feel free to ask questions and as always… please leave a comment. J


1.)    Go to www.cricut.com. Click on the “Information” tab at the top of the page.

2.)    Click on “Cartridge Library” This will give you a complete list of ALL the Cartridges that Cricut has to offer.


3.)    In the “Handbook” column, click on the “view” link for the cartridge that you would like to download. A separate window will open with the digital handbook.

***Notice, there are some cartridges that do not have a digital handbook yet and some of the Lite Cartridges only have a picture of the insert.***

4.)    Scroll to the bottom RIGHT hand corner of your screen. When your mouse hovers over the corner of the screen a small toolbar will appear. Click on the icon that looks like a disk.

5.)    A “Save As” screen will appear. Choose the folder location where you want to store you PDF handbooks. You can choose a folder and then add “New Folder” as I have. I’ve named mine “Cricut Handbooks – PDF Files. Edit the name to how you want it to appear in your iPhone. As you can see the Cheerful Season  Creative Memories cartridge has a default name of “CheerfulSeasons.cw”. Alter this to your choosing. Remember… this is how it will be listed in your iPhone.

***The iPhone app will list your titles alphabetically under the “Titles” view. So if you want to keep your Cricut handbooks separate from you may want to carefully decide how you want to name them. ***

6.)    Next you will need to open your iTunes and connect your iPhone (or iPad) to your computer.
7.)    In the top left hand corner click on “file”. In the drop down menu click on “Add file to library…” (I was unable to get a pic of this)


***I went through and opened every handbook and deleted the extra pages with the different languages on them. If you want to do this, you will want to do it before completing the next steps***


8.)    The “Add to Library” dialogue box will open.
9.)    You will now locate the folder you saved your handbooks in and open the files to add to your iTunes

10.) With your iPhone connected to your computer, click on your device (as you see in photo, mine is named “Angie’s iPhone 4). Choose your iPhone.

11.)Click on the "books" link at the top of the page. Check “sync books”. You can then choose to sync “all books” or “selected books”. If you choose “selected books” as I have, you will need to check the books that you want to sync.
12.) After you are finished selecting your books (pdf handbooks), click on “sync” in the bottom right hand corner of the screen.

Now all you have to do is wait for your iPhone to complete it's sync and then all your Cricut handbooks are now mobile and ready to take along anywhere your iPhone will go. 
I hope this was easy to understand. If you have any questions please feel free to ask. Have a great weekend!! J

Cricut Craft Room Series #2 - Adding Images to Mat and Mat Layers

Well... after working longer than I care to admit on this video... I finally got it completed and uploaded to YouTube. In this video I cover adding images to your mat from both the Overlay view and the Images view. Also I show you how to add may layers to your project, the purpose of the "fill mode enabled" option and the different options you have when it comes time to cut your project with multiple layers.
I hope you find this video useful and come back for the rest of my series. In my next video I will cover the tools and adding fonts to your project. 
As always... I love comments. Feel free to ask questions, make suggestions or make a request for my next video. Enjoy :)


#3 Cricut Craft Room Series #1 - Basics

Yeah! After a lot of frustration and a lot of waiting I was finally able to get my third video uploaded to YouTube last night. I am absolutely in love with Cricut Craft Room. So I wanted to do a series of videos going over the basics of the programs. I learned a lot by just jumping in and pushing buttons, but there was more trial and error than anything. I hope that I will be able to pass on some useful information and inspire you.
This is the first video of the series. If there are any questions you have or something specific you'd like me to cover please leave a comment here on my blog and/or on YouTube. Don't forget to subscribe so you don't miss out on the upcoming videos. I'm actually planning on making the second video today... keep your fingers crossed for me. :)
Hope you enjoy it, and thanks for watching!